You can craft an exquisite homemade bird bath using items from a dollar store with just a few straightforward steps! Begin by collecting a robust bowl and a foundation like bricks. Select a bright area close to trees to entice birds. Prepare the foundation, confirming it’s stable, and fill the bowl with 2 to 3 inches of water. Incorporate decorative stones for both visual appeal and bird safety. Consistent upkeep will keep it appealing. Keep discovering to reveal more suggestions for turning your bird bath into a feathered haven!
Collect Your Materials
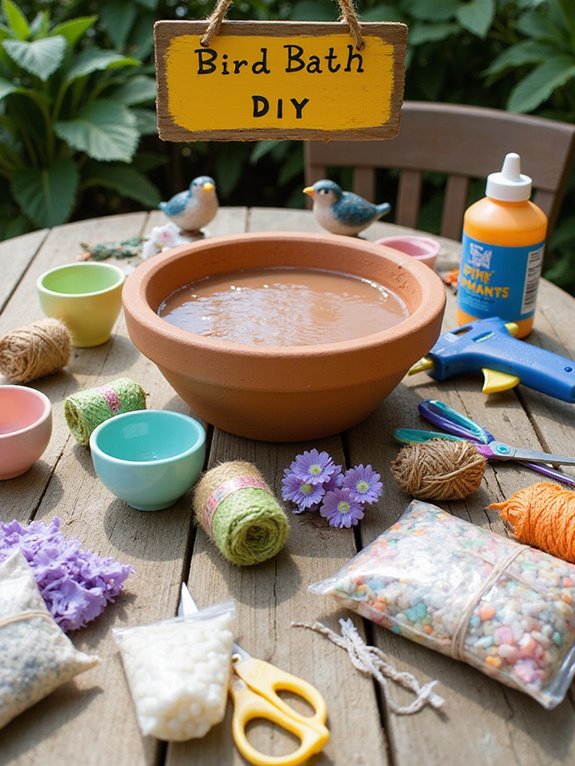
Before you dive into constructing your homemade bird bath, it’s vital to gather the appropriate materials that will aid in making the process smoother and more enjoyable. First, you’ll need some bird bath components, and you’ll be pleasantly surprised at the economical choices available. Start with a sturdy foundation—a large, shallow bowl is ideal. You can easily locate one at your nearby dollar store! Next, think about adding some decorative stones or pebbles for beauty and stability. Don’t forget to acquire waterproof paint or sealant if you wish to customize your bird bath. Lastly, incorporating a small fountain can help keep the water clean, drawing in more feathered visitors! With these materials, you’ll be on your path to crafting a delightful oasis for birds in no time!
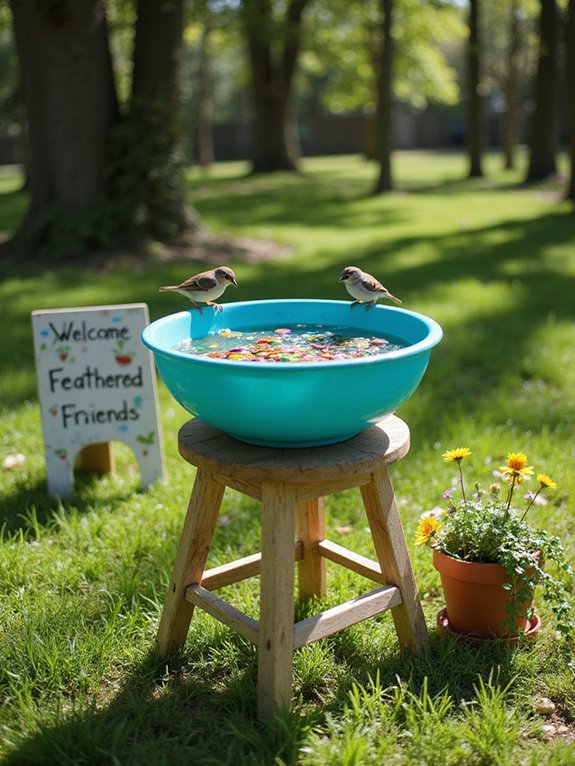
Select the Ideal Location

Selecting the ideal location for your DIY bird bath can significantly impact attracting a range of birds to your yard. Begin by observing bird activity in your surroundings. Birds favor areas that are secure, so position your bath near trees or shrubs that provide shelter from predators. Additionally, factor in sun exposure; placing your bath in a sunny location encourages birds to visit, as they will appreciate the warmth. Ensure it’s also visible from your window, so you can enjoy the view. Lastly, avoid situating the bath too near loud areas, which might scare the birds away. By thoughtfully choosing the right location, you’ll create an inviting oasis for avian friends all year long!
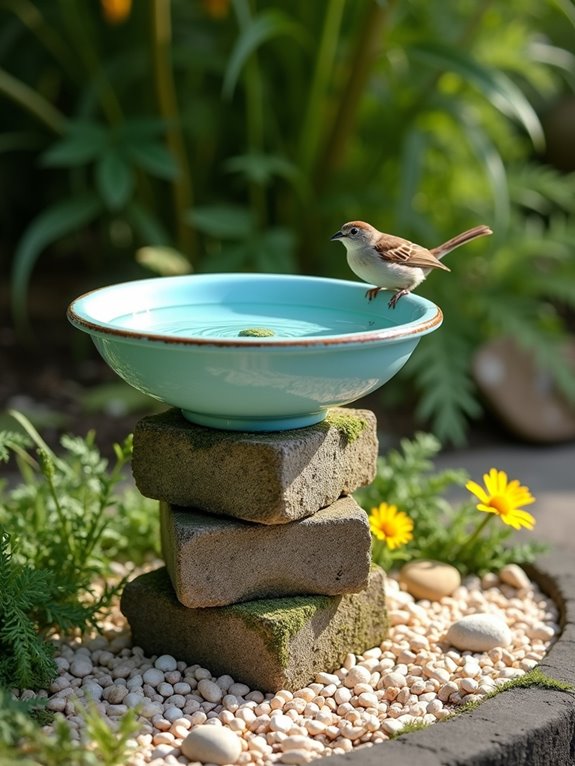
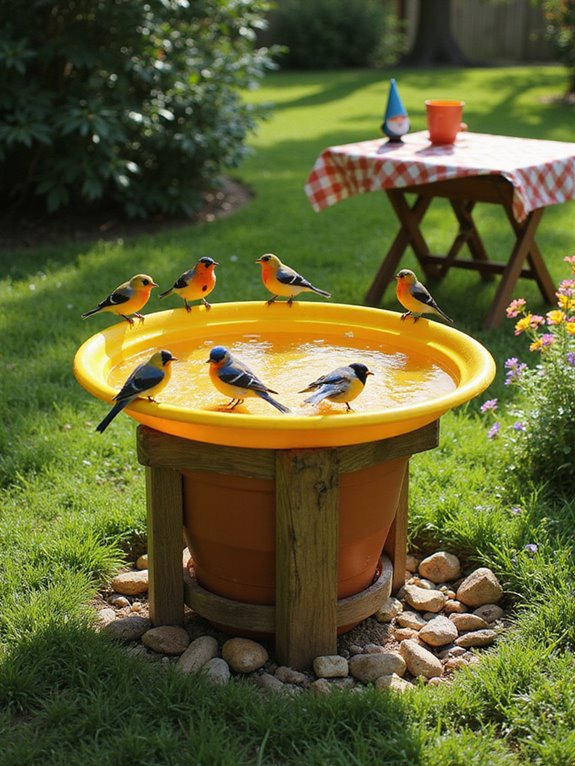
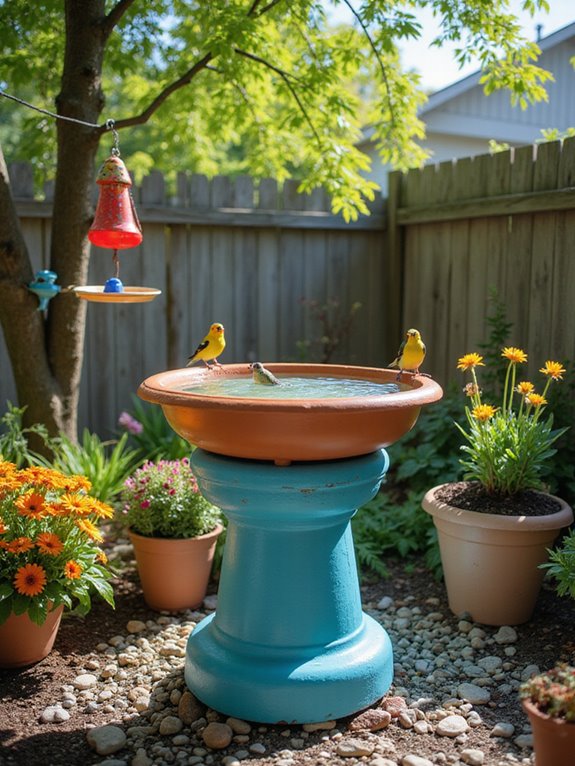
Choose a Foundation for Your Bird Bath

A solid foundation is vital for a functional and appealing bird bath. To begin, think about materials for the base that can endure the elements, such as bricks, cinder blocks, or even durable planters. These alternatives offer both support and stability. When determining height, aim for a level that gives birds easy access without making them feel overly exposed. Generally, a base that’s around 2-3 feet tall is ideal, depending on the layout of your yard. You can also modify the height based on how you want to view the birds. Remember, a solid foundation not only enhances the aesthetics of your DIY bird bath but ensures it remains safe and functional for visiting feathered guests. Happy creating!
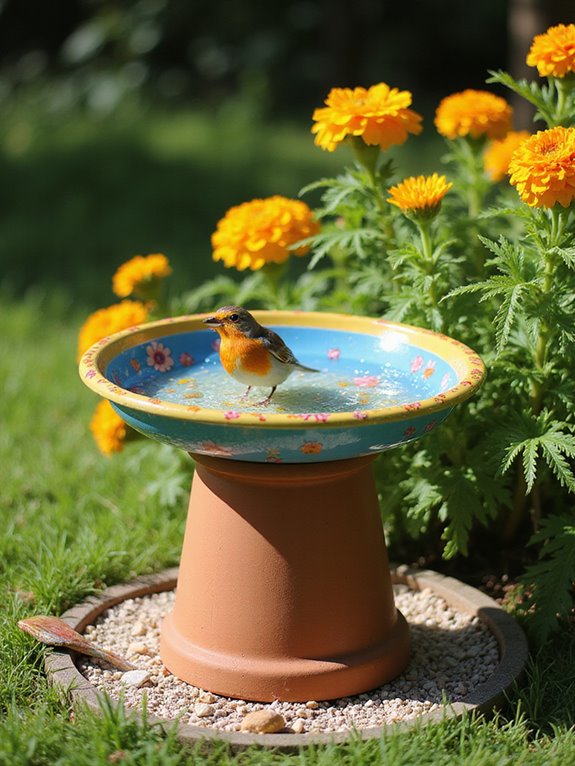
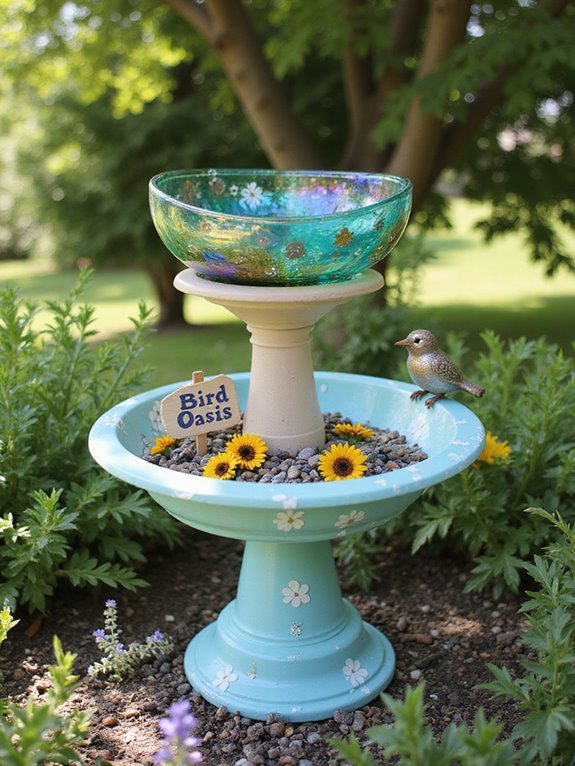
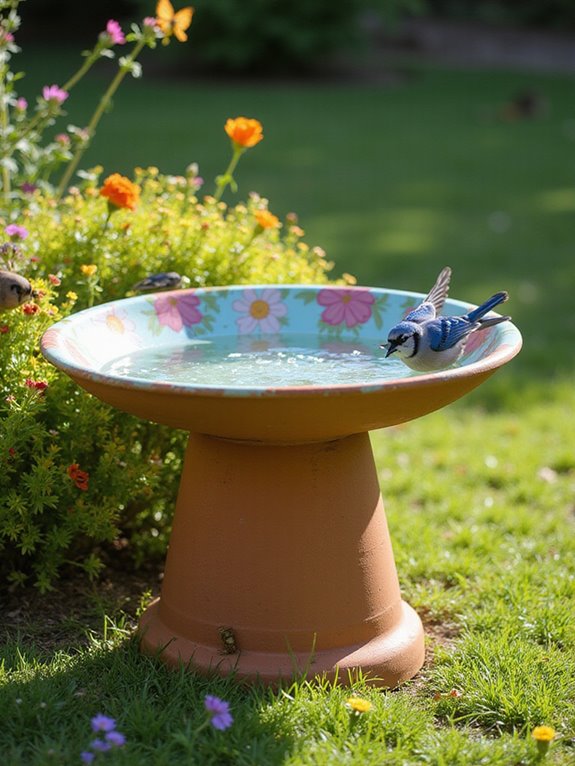
Choose the Bowl Design

Now that you’ve established a strong foundation, it’s time to concentrate on the bowl design for your bird bath. You’ll want to investigate various bowl materials to find something appropriate and weather-resistant. Consider options like shallow plastic containers, metal trays, or ceramic dishes. Each provides a distinct look and durability. For design ideas, reflect on the theme of your garden or outdoor area. You could opt for a rustic charm with a vintage bowl or a modern flair with a sleek, shiny one. Ensure the bowl has sufficient depth for the birds while making it easy for them to drink or bathe. This artistic decision will enhance your backyard and draw in a variety of feathered visitors!
Set Up the Foundation
Setting up the foundation for your bird bath is a crucial step that establishes its stability and aesthetics. You want to ensure your bird bath stands strong and looks attractive in your yard. Here’s how to prepare it effectively:
- Choose Your Materials: Select sturdy bird bath materials such as bricks, pavers, or wooden posts to create a robust base.
- Create a Level Surface: Ensure the area is flat. Uneven ground can lead to tipping, compromising foundation stability.
- Secure Your Design: After placing, reinforce the foundation by burying the bottom slightly in the ground or using adhesive for extra support.
Sanitize Your Materials
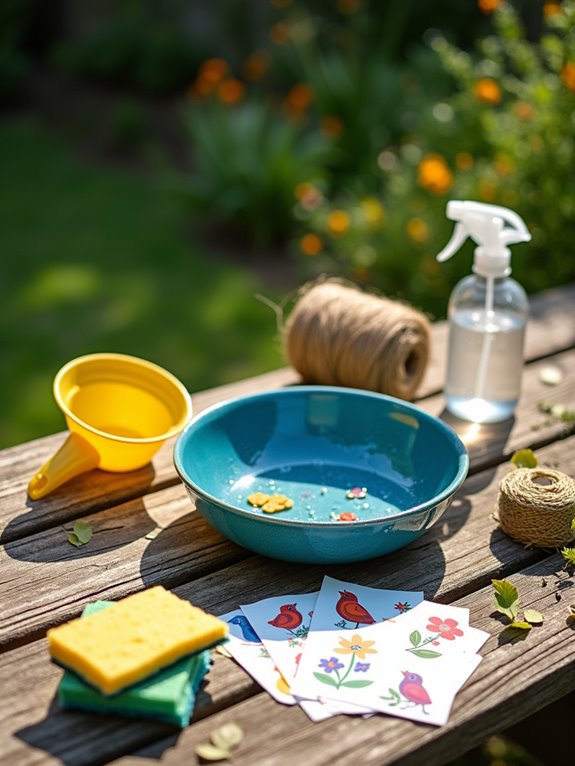
Before you begin assembling your bird bath, it’s crucial to sanitize your materials to ensure they’re devoid of dust, dirt, and any chemicals that could be detrimental to birds. Start by rinsing the items thoroughly with water to remove surface debris. Then, use eco-friendly cleaning agents like vinegar or baking soda to disinfect the materials. These natural cleaners effectively kill germs without introducing harsh chemicals. Apply your cleaning solution, scrub with a gentle brush, and rinse thoroughly to ensure no residue remains. Don’t forget to allow everything to dry completely before proceeding. This step creates a safe environment for birds, transforming your DIY bird bath into a welcoming oasis they’ll love visiting.
Secure the Bowl to the Base
It’s time to firmly attach the bowl to the foundation of your bird bath, and you’ll want to ensure it’s done properly for stability and safety. Using effective bonding methods will ensure your bird bath endures the elements. Start by selecting the most suitable adhesive options for your materials. Here’s what you need:
- Clean Surfaces: Ensure both the bowl and base are thoroughly cleaned to allow for maximum adhesion.
- Apply Adhesive: Use a strong adhesive appropriate for outdoor use, following the manufacturer’s instructions.
- Secure Position: Press the bowl firmly onto the base and hold it in place until the adhesive has set.
Make sure to let it fully cure before adding water. Now, you’re one step closer to drawing beautiful birds to your yard!
Seal With Waterproof Adhesive
With the bowl firmly secured to the base, it’s time to proceed to the next phase and seal your bird bath using waterproof adhesive. Opt for a premium waterproof sealant or adhesive product that is fit for outdoor use. These items ensure your bird bath can resist rain and sunlight while keeping the water contained. Apply the adhesive along the junction where the bowl meets the base, ensuring to fill any crevices. Use a spatula or your finger to smooth it out for a polished look. Allow it to cure according to the manufacturer’s guidelines, usually around 24 hours. Once dried, you have fashioned a resilient haven for your feathered companions! Now, you’re one step closer to your charming DIY bird bath.
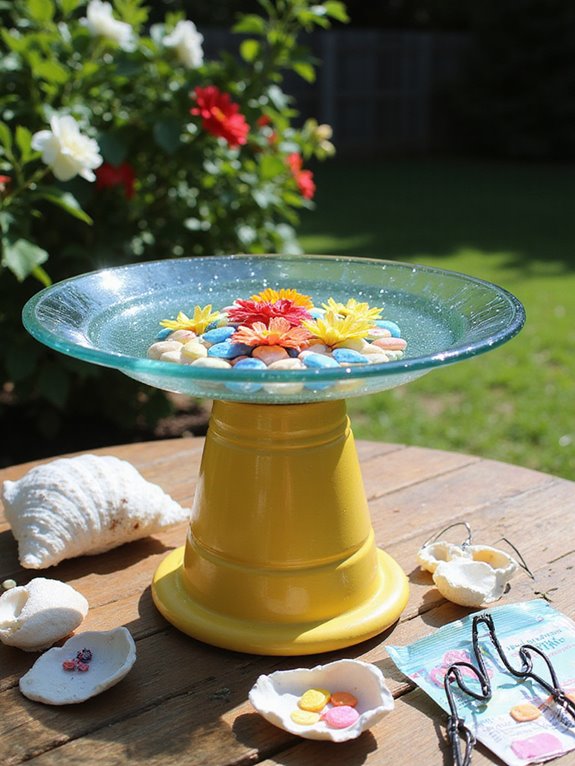
Paint or Decorate as Desired
Now that your bird bath is completely constructed, you can unleash your imagination by painting or adorning it as you wish. This phase enables you to transform your project to suit your tastes and the surroundings. Consider these suggestions to kickstart your creativity:
- Color Selections: Choose vivid, weather-resistant paints that will stand out in your garden or seamlessly blend into the milieu.
- Decorative Styles: Contemplate themes such as botanical patterns, beach-inspired designs, or a rustic farmhouse aesthetic that can enhance your outdoor setting.
- Personalized Accents: Incorporate stones, shells, or mosaic pieces for a distinctive touch.
Feel free to have a good time while infusing your personality into your bird bath. The right color selections and decorative styles can create a delightful enhancement to your garden!
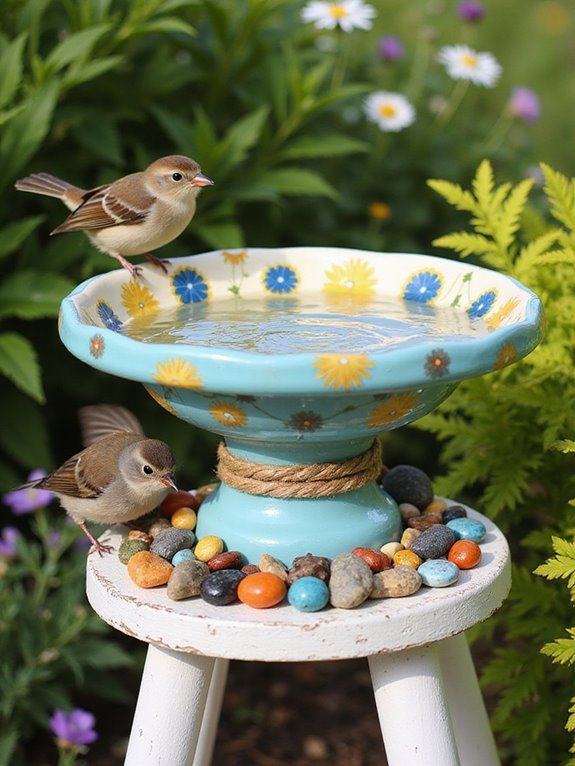
Add a Layer of Gravel
Establishing a stable and welcoming environment for birds begins with adding a layer of gravel to your bird bath. Select gravel types like smooth pebbles or crushed stone to form a textured surface that birds will appreciate. This layer offers excellent drainage properties, ensuring that water doesn’t accumulate and become stagnant, which may deter our feathered visitors. By allowing excess water to flow away, you keep the bath clean and fresh. Distribute the gravel evenly across the bottom of your bath, approximately one inch deep. This not only serves a functional purpose but also enhances visual appeal. Birds feel more secure with a stable base, encouraging them to visit your DIY creation frequently. Enjoy observing as they splash and frolic!
Fill With Water
Filling your bird bath with water is a vital step to draw a multitude of feathered guests. Ensuring the proper conditions helps establish a secure and appealing environment for birds. Here’s how to effectively do it:
- Select the Right Water Temperature: Utilize water that is cool but not excessively cold, ideally around room temperature, to motivate birds to bathe.
- Maintain Bath Depth: Fill the bath to a depth that invites birds, typically about 2 to 3 inches deep. This depth enables birds to splash without overwhelming them.
- Change Regularly: Keep the water clean and fresh. Replace it every few days to prevent algae growth and uphold a healthy bathing area.
By following these steps, your bird bath will soon become a popular spot for local birds!
Add Decorative Stones or Pebbles
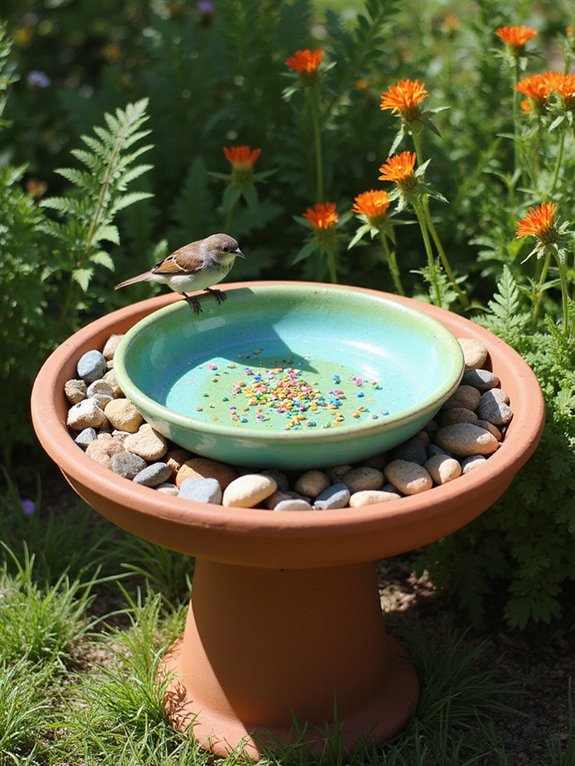
To boost the attraction of your bird bath and create an inviting ambiance, incorporating decorative stones or pebbles can significantly enhance its charm. Select stone varieties that complement your garden’s aesthetic and align with the decorative styles you envision. For instance, smooth river stones provide a natural appearance, while colorful glass pebbles can introduce a playful element. Organize the stones creatively around the edges or even within the water to add depth and texture. This will not only make your bird bath visually captivating, but it’ll also offer visiting birds a secure place to perch. Ensure to rinse the stones thoroughly before placing them, guaranteeing they’re free of debris. Your improved bird bath will undoubtedly entice feathered visitors!
Install a Bird-Friendly Ramp
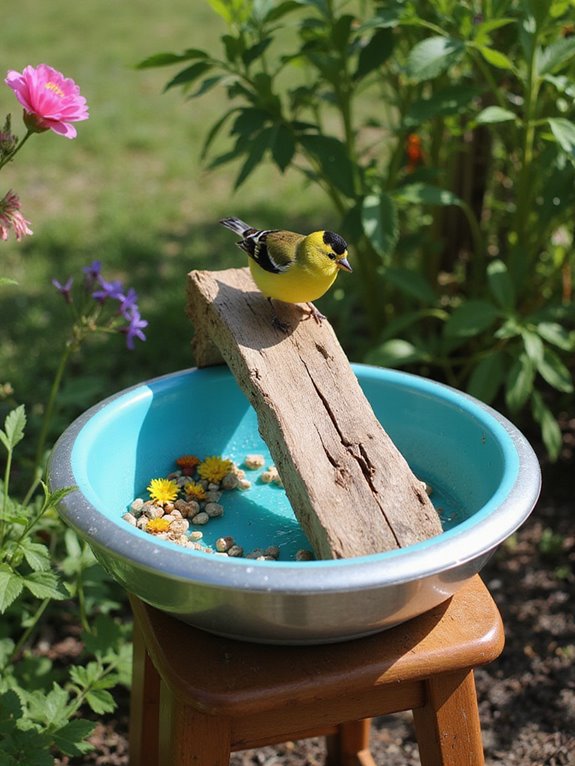
Installing a bird-friendly ramp can greatly improve your bird bath, making it simpler for birds to access the water safely. A well-constructed ramp not only encourages bird safety but also adds aesthetic value to your DIY project. Here are three elements to consider for your ramp materials:
- Wooden planks: These are durable and natural-looking, blending nicely with the environment.
- Rocks or stones: These can be organized to create a gentle slope while offering grip for tiny feet.
- Slip-resistant matting: This ensures birds can securely perch while avoiding slips.
As you select your materials, prioritize bird safety. A gentle incline and textured surfaces will allow your feathered friends to enjoy their new bath without anxiety. Happy crafting!
Surround With Natural Elements

Creating a tranquil environment surrounding your bird bath can enhance both its aesthetic and functionality. To achieve this, consider integrating natural landscaping that complements your garden. Utilize stones, pebbles, or wood to establish a rustic appearance that attracts birds. Introduce seasonal plants nearby to add bursts of color and offer natural shelter for visiting birds. Native flowers, such as coneflowers or sunflowers, not only beautify the space but also attract insects, providing nourishment for the birds. Ensure the surrounding plants are easy to maintain, flourishing with minimal effort. By merging these natural components, you’ll create a welcoming atmosphere where birds feel secure and eager to enjoy your DIY bird bath, enlivening your outdoor space.
Safety Check and Stabilization
Prior to positioning your bird bath, it is crucial to perform a comprehensive safety assessment and ensure stability. This procedure is important for both the well-being of the birds and the durability of your project. Adhere to these safety measures and stability evaluations to ensure a successful installation:
- Inspect for sharp edges: Ensure there are no pointed areas that could injure birds or pets.
- Level the surface: Verify that the ground is even to avoid tipping, which might cause water spillage and jeopardize stability.
- Stabilize the base: If you used adhesive or glue, confirm that everything is securely positioned; gently shake the bird bath to confirm it remains stationary.
Maintenance Recommendations for Durability
To ensure your DIY bird bath remains attractive and functional for years ahead, consistent upkeep is essential. Develop a cleaning schedule that involves scrubbing the bath monthly to eliminate algae and dirt. Utilize a blend of vinegar and water for an all-natural and effective cleaning solution. Be sure to rinse thoroughly afterward to ensure no residue is left. Furthermore, refresh the water every few days, particularly during warm weather, to keep it appealing and clean for birds. If you observe any debris such as leaves or dirt, remove them promptly to avoid stagnation. By dedicating yourself to these straightforward tasks, you’ll not only beautify your bird bath but also ensure it serves as an inviting spot for your avian companions.
Enticing Birds to Your New Bath
Even though you’ve established your new DIY bird bath, attracting winged visitors may require a bit more effort. To cultivate a welcoming atmosphere, consider these three techniques:
- Include Native Plants: Incorporate flora that appeals to specific species. Birds are fond of native plants, which offer natural food sources and shelter.
- Offer Optimal Feeding Choices: Position feeders nearby filled with sunflower seeds or suet. These food items attract various birds and encourage them to visit your bath.
- Maintain Fresh Water: Change the water frequently. Clean, fresh water is vital for birds and makes them feel secure while bathing.
Final Thoughts
You’ve created a beautiful DIY bird bath, transforming your outdoor space into a vibrant haven for birds, akin to a vivid painting coming to life. By adhering to these straightforward guidelines, you’ve fashioned an inviting area that not only enhances your garden but also aids in supporting local fauna. Continue with your maintenance, and soon you’ll relish the enchanting visits from feathered guests. Keep in mind, your efforts will draw nature nearer, making your outdoor environment feel even more lively and splendid. Happy birdwatching!


